If your book is strong in setting, a fun and easy way to reach new readers is by creating a Google Map. Because my novels take place all over the world and the stories are set in actual museums, cafes, and monuments, I thought it would be a good way of transporting readers to the settings I describe.
Honestly, creating a map for my novel The Lover’s Portrait, was one of the first things I did when I started self-publishing. However, it wasn’t liked or retweeted often on social media so I stopped sharing it and frankly forgot about it. Only recently, when checking for dead links on my website, did I take another look at it. To my shock and delight, it has garnered a whopping 10,300 views in two years – without any promotion. That’s far more views than the book trailer for the same novel has ever received, one I do frequently promote. For authors with books strong in setting, creating a custom Google Map is well worth the time. Since discovering how many views this first map received, I am now creating one for each of my six novels and promoting them.
In Google Maps, you can select streets, monuments, parks, restaurants, hotels, businesses, and the like. If the location you select is linked to a website, it will also be included, along with any photographs that have been uploaded to Google and tagged with the location. If there are no photos associated with the location, you can upload them yourself.
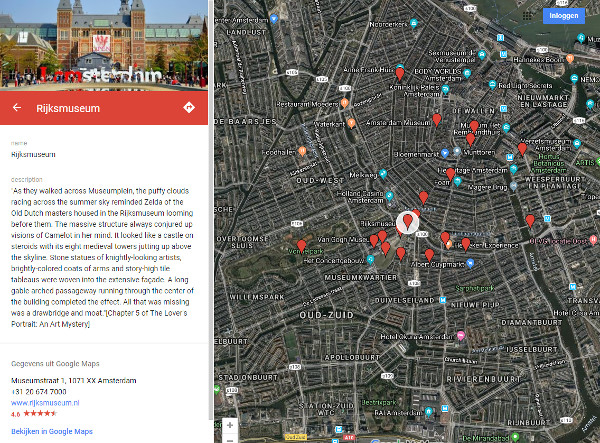
Here’s a screenshot of what a custom Google Map looks like when you link to an existing business, company, or cultural institution, in this case, the Rijksmuseum. You can see the location’s name, excerpts I added to the description, photos, and a link to the Rijksmuseum’s website.
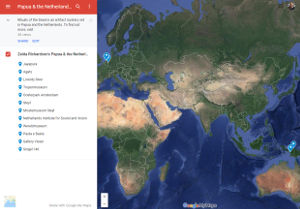
Before you begin, I recommend you take a close look at a custom Google Map and familiarize yourself with the basic layout. That will make this information about how to create your own so much easier to understand. Here are three of mine for Rituals of the Dead, The Lover’s Portrait, and Down and Out in Kathmandu.
I also strongly suggest you create a single text document of all of the descriptions and information you want to include in your map. It will save time later in this process.
How to create a Google Map:
To create a new map, log into Google Maps using your Gmail account name and password. If you don’t already have an account, you create one for free.
After you log in, select: ‘Create New Map’. This will create a new ‘Untitled Map’. Click on the name ‘Untitled Map’ to edit it.
Once you’ve done that, fill your first location in and search for it. You may find multiple results. Each time you select a location, a white popup box will appear listing the GPS coordinates and any information that is already linked to it. Once you are satisfied with your choice of location, click ‘+ add to map’ inside the white popup box to add it to your map.
Now comes the trickiest part of setting this up.
When you add your first location, it will create a new ‘untitled layer’ in the toolbar floating on the left-side of your screen. Rename this layer straightaway. I use the name of my character and places described, for example ‘Zelda Richardson’s Amsterdam’ and ‘Zelda Richardson’s Nepal and Thailand’.
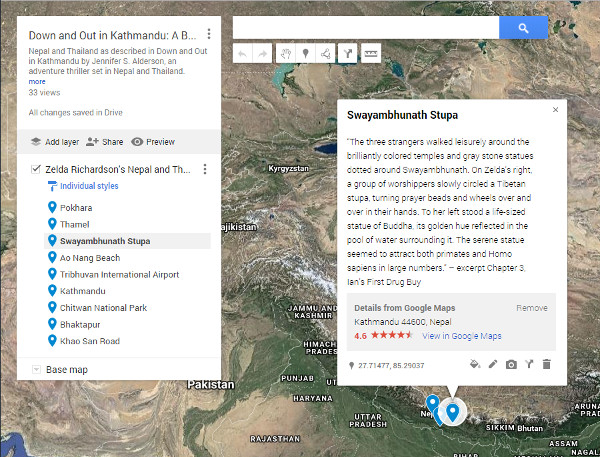
Make sure the box next to your renamed layer stays selected when you search for your next location. If you don’t, every time you add a new location, it will create a new layer and you will need to start all over.
All changes are saved in Google Drive as you work. You can always delete your map and start over if you aren’t happy with it!
Add all of the locations you want to pinpoint on your custom map. Every time you add a new location, it should be added to your renamed layer. After your map is finished, this will be the list that displays in the left-hand sidebar of your specific map. Here’s a screenshot of what my map ‘Zelda Richardson’s Amsterdam’ looks like.
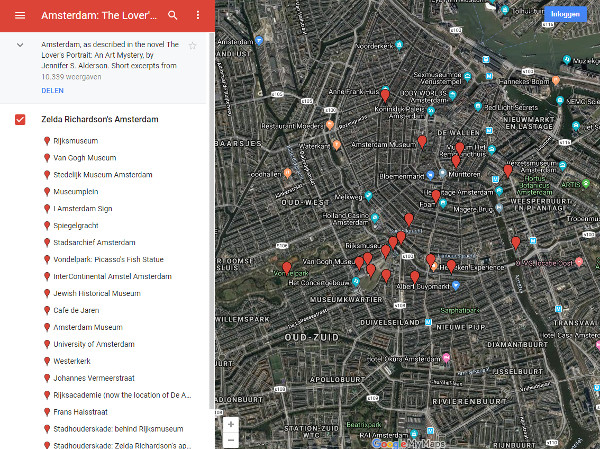
Once you have added all of your locations, you can add a short description to each. For most, I choose to add excerpts from my novels that describe it from my character’s perspective. For a few other locations, I described the importance of the setting to my characters, for example where Zelda Richardson lives in Amsterdam and the location of the university she’s studying art history at.
To add these text descriptions, click on the three vertically aligned dots next to your layer in the floating toolbar. You have three choices: Delete, Edit, Open Table. Click on ‘Open Table’. Cut and paste each block of text into the description field. Google Drive can be a bit slow when responding, give the database time to update your description before moving onto the next one.
Once you’re finished, close the table and it’s saved. While you are editing your map, you will see your text appear in the white box linked to the point on your map. As soon as it’s live (or in preview mode), the text shows up on the left-hand side of your map.
While in editing mode, you can also edit the color of the pinpoint or add a photo by clicking on the icons across the bottom of the white pop up box. Choose the ‘Base Map’ – the initial map visitors see – by clicking on ‘Base Map’ at the bottom of the sidebar your layer is in.
To remove a location, click on it while in editing mode. Inside of the white pop up box you will see a ‘delete feature’ link. Click this and the location is gone forever.
When you are satisfied with your custom map, click on the SHARE link. It will tell you that the map is set to private. Click on the ‘Change permissions’ link next to this text message. Set your map to ‘Public on the web’ and ‘no log in required’ and you are good to go.
That’s all there is to it! Once your map is set to public, you can share it with your social media network, newsletter readers, and add it to your website.
I would love to see what your book’s map looks like. Once you have created one, why not add a link to it in the comments so we can all take a look?
Many thanks to BooksGoSocial for featuring this article on their blog! Here’s the link.
